Your roof is an essential part of your home’s structure, providing protection from the elements and maintaining the integrity of your property. Over time, however, roofs can develop minor issues that require attention. While some problems may necessitate professional help, many common roofing issues can be addressed with some DIY skills and the right tools. In this comprehensive guide, we’ll explore various tips and tricks for tackling minor roof repairs yourself, empowering you to safeguard your home and save on repair costs.
Table of Contents
- Assessing the Damage
- Materials and Tools Needed
- Common Roofing Issues and How to Fix Them
- Safety Precautions
- Step-by-Step Guide to DIY Roof Repair
Assessing the Damage
Before delving into any DIY roof repair endeavor, it’s imperative to conduct a comprehensive evaluation of the damage your roof has incurred. Commence this process by meticulously scrutinizing your roof, employing a multi-faceted approach. Firstly, perform a thorough visual inspection from ground level, scouring the expanse of your roof for any apparent signs of distress. Scan for anomalies such as missing or damaged shingles, irregularities in the roofing structure, or areas where water might be pooling.
However, to attain a more precise assessment, it’s advisable, if circumstances permit and safety precautions are diligently adhered to, to ascend onto the roof for a closer examination. While aloft, scrutinize the entirety of the roof’s surface, paying close attention to areas that are typically vulnerable to damage, such as valleys, ridges, and flashing. Look for subtle indicators of wear and tear, including granule loss on asphalt shingles or cracks in roofing materials.
Moreover, it’s essential to not solely focus on the exterior of your roof; internal signs of damage can often provide valuable insights into underlying issues. Inspect the interior of your home for any telltale signs of water intrusion, such as water stains on ceilings or walls, mold or mildew growth, or musty odors. These manifestations can offer critical clues as to the source and extent of the roof damage.
By meticulously identifying and cataloging the specific issues plaguing your roof, you’ll be equipped with the requisite knowledge to formulate a targeted and effective repair strategy. This proactive approach not only facilitates the efficient execution of repairs but also minimizes the risk of overlooking underlying issues that could exacerbate over time if left unaddressed.
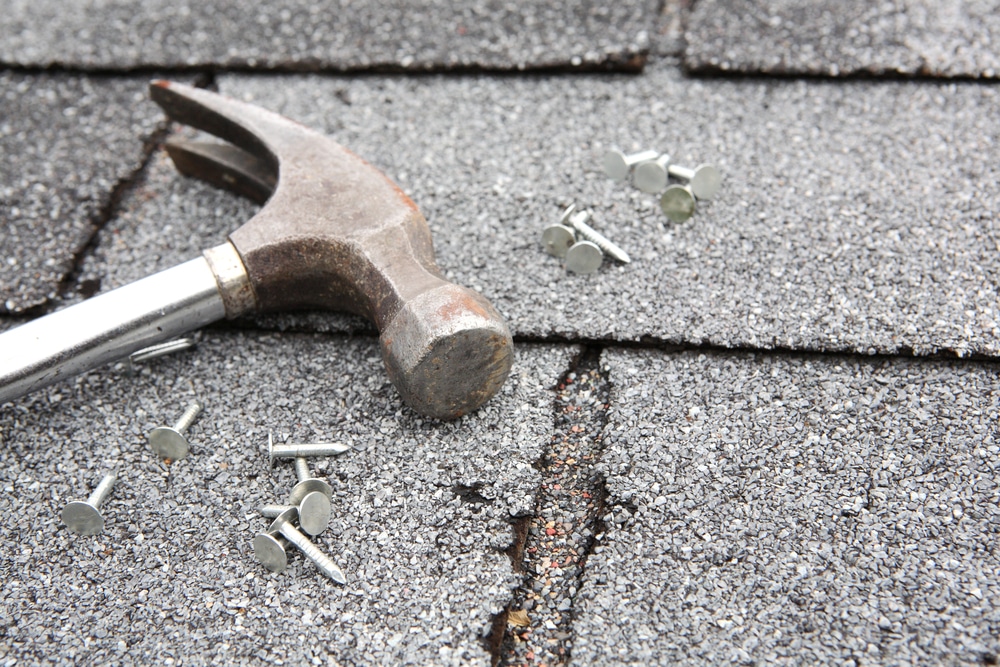
Materials and Tools Needed
The successful execution of DIY roof repairs hinges on the availability of the appropriate materials and tools necessary to undertake the task competently. The nature and extent of the repairs required will dictate the specific items you’ll need to procure. At the forefront of your inventory should be materials tailored to address the identified issues, such as replacement shingles, roofing nails, and roofing cement.
For instance, if you’re confronted with missing or damaged shingles, ensuring you have an ample supply of replacement shingles that match the existing roof material is paramount. Additionally, having an array of roofing nails and roofing cement at your disposal will facilitate the secure installation and sealing of the new shingles.
Similarly, if the repairs necessitate addressing issues with flashing or sealing joints, you’ll require specialized materials such as flashing material and caulk to fortify these vulnerable areas against water infiltration. Furthermore, safety gear is non-negotiable; gloves, goggles, and a harness are indispensable safeguards that protect against potential hazards inherent in working at heights.
In tandem with materials, equipping yourself with the requisite tools is equally imperative. Basic tools such as a sturdy ladder, hammer, pry bar, utility knife, and caulking gun are indispensable companions in your repair endeavors. These tools enable you to navigate various aspects of the repair process, from removing damaged materials to applying sealants and adhesives.
Common Roofing Issues and How to Fix Them
Shingle Replacement
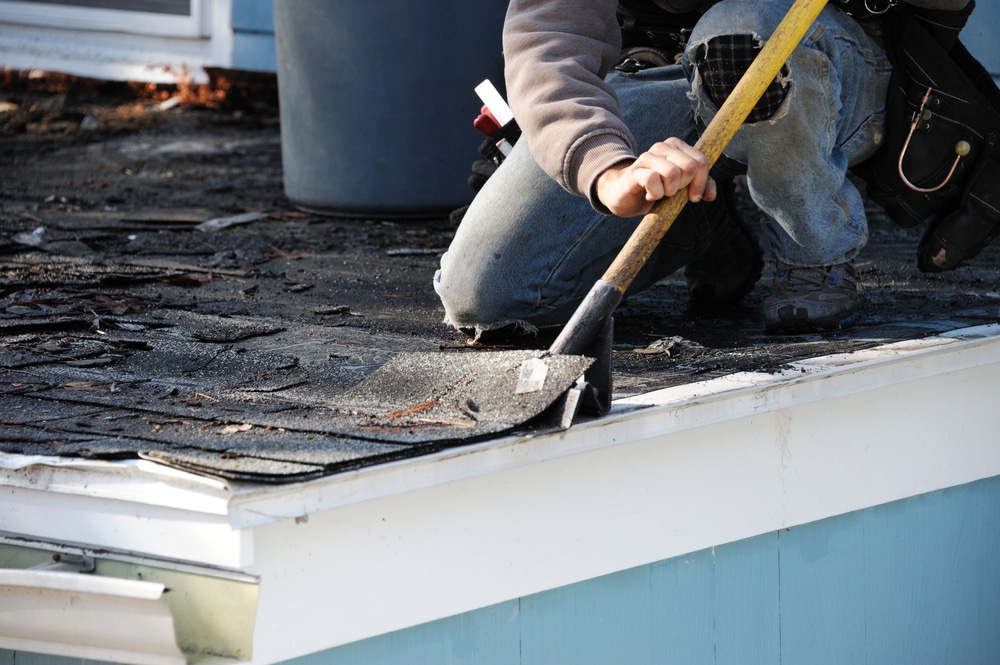
Missing or damaged shingles are among the most common roofing issues homeowners encounter, often as a result of inclement weather or natural wear and tear. To replace a damaged shingle, begin by carefully lifting the edges of the surrounding shingles using a pry bar. Next, slide the new shingle into place, ensuring it overlaps the adjacent shingles to create a seamless seal. Secure the new shingle with roofing nails, and apply roofing cement along the edges to reinforce the bond and prevent water infiltration.
Fixing Leaks
A leaking roof can lead to significant damage within your home if left unchecked. Locating and repairing the source of a leak promptly is essential for preventing water damage and preserving the structural integrity of your property. Start by inspecting your roof for signs of water intrusion, such as water stains on ceilings or walls. Trace the source of the leak back to its origin on the roof, and apply roofing tar or sealant to the affected area, ensuring a watertight seal to prevent further leaks.
Repairing Flashing
Flashing is a vital component of your roof’s waterproofing system, designed to seal joints and edges and prevent water infiltration. Over time, flashing can become damaged or deteriorate, compromising its effectiveness and leaving your roof vulnerable to leaks. To repair flashing, begin by removing any old or damaged flashing using a pry bar. Cut a new piece of flashing to size, and secure it in place using roofing nails. Finally, seal the edges of the flashing with roofing cement or caulk to ensure a durable and watertight seal.
Cleaning Gutters
Clogged gutters can impede the proper drainage of rainwater from your roof, leading to water backup, roof damage, and potential structural issues. Regularly cleaning your gutters is essential for maintaining the integrity of your roof and preventing water-related damage to your property. To clean your gutters effectively, use a ladder to access them safely, and remove any debris such as leaves and twigs by hand or using a gutter scoop. Once cleared, flush the gutters with water to ensure unobstructed drainage and prevent future issues.
Safety Precautions
Safety should always be a top priority when undertaking DIY roof repairs. Working at heights and on sloped surfaces poses inherent risks, and it’s essential to take appropriate precautions to minimize the likelihood of accidents or injuries. Before starting any repair work, ensure you have the necessary safety gear, including gloves, goggles, and a harness if working at heights. Additionally, never attempt to repair a roof in adverse weather conditions such as rain or high winds, as these conditions can increase the risk of slips, falls, and other accidents. If you’re uncertain about the extent of the damage or how to proceed with repairs safely, don’t hesitate to seek professional assistance.
Step-by-Step Guide to DIY Roof Repair
Now that you’ve equipped yourself with an understanding of the necessary materials, tools, and common roofing issues, let’s delve into a comprehensive step-by-step guide to undertaking DIY roof repairs. By following these meticulous steps, you’ll be empowered to address minor roofing issues with confidence, safeguarding your home and ensuring its longevity.
1. Assess the Damage
The first crucial step in any DIY roof repair endeavor is to conduct a meticulous assessment of the damage your roof has sustained. Begin by embarking on a thorough inspection of the roof, both from ground level and, if safely feasible, by ascending onto the roof’s surface. Scrutinize the entirety of the roof for any signs of wear and tear, including missing or damaged shingles, areas of pooling water, or evidence of leaks within your home. By meticulously identifying the specific issues afflicting your roof, you’ll be better equipped to formulate an effective repair strategy tailored to address these concerns.
2. Gather Materials and Tools
With a clear understanding of the repairs required, the next step is to assemble all necessary materials and tools to facilitate the repair process seamlessly. Ensure you have an ample supply of materials tailored to address the identified issues, such as replacement shingles, roofing nails, roofing cement, and flashing material. Additionally, equip yourself with essential tools including a ladder, hammer, pry bar, utility knife, caulking gun, and safety gear such as gloves, goggles, and a harness. By meticulously organizing and procuring all necessary materials and tools beforehand, you’ll streamline the repair process and minimize disruptions.
3. Prepare the Work Area
Before commencing the repair work, it’s imperative to prepare the work area meticulously to ensure a safe and conducive environment for undertaking the repairs. Clear any debris or obstacles from the roof’s surface, ensuring unimpeded access to the areas requiring attention. Additionally, take proactive measures to mitigate potential safety hazards by erecting warning signs, securing ladders, and implementing fall protection measures if working at heights. By prioritizing safety and meticulously preparing the work area, you’ll minimize the risk of accidents and facilitate a smooth execution of the repair tasks.
4. Perform the Repairs
With the work area prepared and materials at the ready, it’s time to embark on the repair process itself. Depending on the nature of the issues identified during the assessment phase, follow the appropriate steps for repairing shingles, leaks, flashing, or gutters. Adhere closely to manufacturer guidelines and industry best practices to ensure the repairs are executed with precision and efficacy. Whether replacing damaged shingles, sealing leaks, or reinforcing flashing, methodical execution and attention to detail are paramount to achieving durable and long-lasting repair outcomes.
5. Double-Check Your Work
Once the repairs have been completed, it’s essential to conduct a thorough inspection of the work to ensure everything is sealed and secure. Carefully scrutinize the repaired areas, paying close attention to the quality of workmanship and the effectiveness of the repairs in addressing the identified issues. Take proactive measures to address any discrepancies or areas requiring additional attention promptly. By double-checking your work and ensuring all repairs are executed to a high standard, you’ll instill confidence in the integrity of your roof and mitigate the risk of future issues arising.
6. Clean Up
As the final step in the DIY roof repair process, take the time to meticulously clean up the work area, removing any debris or materials leftover from the repair process. Clearing debris from the roof and surrounding areas not only enhances the aesthetic appeal of your property but also prevents potential hazards and impediments to proper drainage. By taking proactive measures to clean up thoroughly, you’ll ensure your roof remains free from obstructions and maintain optimal functionality for years to come.
While some roofing issues may necessitate professional attention, many minor problems can be addressed with a bit of DIY know-how. By meticulously assessing the damage, gathering the requisite materials and tools, and adhering to safety protocols, you can effectively tackle common roofing issues such as shingle replacement, leak repair, flashing, and gutter cleaning. It’s essential to prioritize safety throughout the repair process and seek professional assistance if you’re uncertain about the extent of the damage or how to proceed with repairs.
If you find yourself in need of professional roofing services or guidance, don’t hesitate to reach out to CAN Roof Construction. Our team of experienced professionals is equipped with the expertise and resources to address all your roofing needs promptly and efficiently. From minor repairs to full roof replacements, we’re committed to delivering exceptional results and ensuring the longevity and integrity of your roof. Contact us today to schedule a consultation and take the first step towards a safer, more secure roof.