Skylights, those captivating portals that invite sunshine to cascade into our living spaces, have become an increasingly popular architectural feature. Their ability to infuse rooms with natural light can transform even the gloomiest corners into inviting havens. In this guide, we’ll delve into the art of installing a skylight on a new roof, exploring the considerations, steps, and rewards of this architectural endeavor.
Table of Contents
- Enhancing Natural Light: Installing a Skylight on a New Roof
- Planning for Success: Factors to Consider Before Installation
- Step-by-Step Guide: How to Install a Skylight on a New Roof
- Enhancing Aesthetics and Functionality: Interior and Exterior Considerations
- Maintenance and Longevity of Skylights
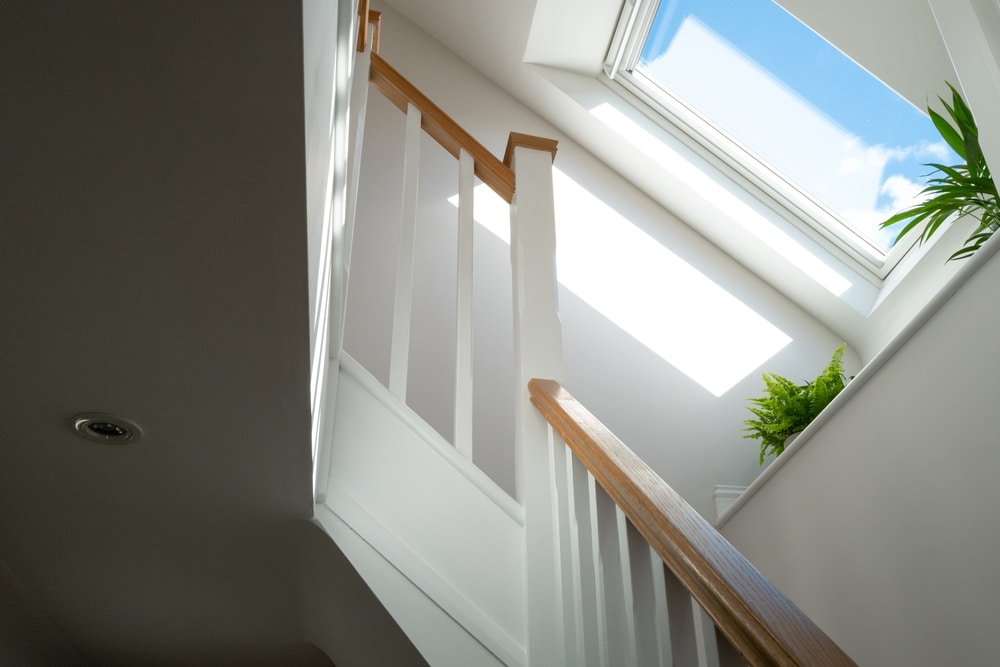
Enhancing Natural Light: Installing a Skylight on a New Roof
Skylights don’t just illuminate rooms; they add an enchanting touch to interiors and have a positive impact on our well-being. As we navigate through the intricacies of skylight installation, we’ll uncover the nuances of maximizing their potential while ensuring a seamless integration with the new roof. In the upcoming sections, we’ll demystify the process of installing a skylight on a new roof, offering practical insights and guidance. Whether you’re a DIY enthusiast or planning to work with professionals, understanding the essentials of skylight installation will empower you to make informed decisions and create a well-lit, inviting living environment. So, let’s embark on this illuminating journey, as we learn to bring the skies closer and enhance the character of our homes through the installation of skylights.
Planning for Success: Factors to Consider Before Installation
Embarking on the journey of installing a skylight on a new roof requires careful planning to ensure a seamless and effective process. By taking into account various essential factors, you can set the stage for a successful installation that enhances both the aesthetics and functionality of your living space.
Evaluating the Ideal Location for the Skylight
When determining where to install your skylight, consider the purpose of the room and the movement of the sun throughout the day. Placing the skylight on the south-facing side of the roof generally provides the most consistent and even natural light. However, if you’re concerned about excessive heat gain, positioning the skylight on the east or west side might be more suitable. Analyzing the room’s layout and the angle of the roof can help you choose the optimal location for maximum sunlight penetration and minimal glare.
Determining the Appropriate Size and Style of Skylight
Skylights come in various sizes and designs, offering versatility in terms of aesthetics and functionality. The size of the skylight should be proportionate to the room’s dimensions. Larger skylights work well in spacious areas, while smaller ones are ideal for more compact spaces. Additionally, the style of the skylight should align with your home’s architectural style and your personal preferences. Choose between fixed skylights for unobstructed views, vented skylights for increased ventilation, or tubular skylights for spaces with limited roof space.
Assessing the Roof’s Structural Integrity and Angle for Optimal Positioning
Before you start putting in a skylight, it’s really important to check if your roof is strong enough. Talk to an expert to make sure your roof can handle the weight of the skylight without any problems. Also, think about how steep your roof is. That matters for putting the skylight in the right place. If your roof isn’t very steep, you might need to add something to help water flow away from the skylight. But if your roof is steeper, water should drain away naturally.

Budget Considerations and Materials Needed for the Installation
When embarking on the journey of incorporating a skylight into your living space, it’s essential to recognize that the expenses go beyond the skylight’s mere acquisition. Alongside the skylight’s price tag, it’s imperative to factor in associated labor costs, requisite materials, and potential adjustments to the roofing structure. Diversifying your perspective involves examining a range of skylight options, assessing not only their upfront costs but also their potential to yield long-term energy savings and enhance your property’s value.
By carefully evaluating these crucial factors during the planning stage, you’ll pave the way for a successful skylight installation that seamlessly integrates with your new roof. Your meticulous planning will ultimately result in a well-lit, comfortable, and visually appealing living space that benefits from the beauty and warmth of natural sunlight.
Step-by-Step Guide: How to Install a Skylight on a New Roof
- Gathering Necessary Tools and Equipment: Before you initiate the installation process, ensure you have all the essential tools and materials at your disposal. From a trusty tape measure and a level for precision to a power drill equipped with the right bits, roofing nails or screws for secure fastening, and the critical flashing materials that safeguard against leaks – each component plays a crucial role. Don’t forget the waterproof sealant that guarantees a watertight finish, the insulation materials that contribute to energy efficiency, and the reliable caulking gun for seamless sealing. Having these tools ready ensures a streamlined installation journey.
- Ensuring Safety Measures Are in Place: A paramount consideration during any construction endeavor is safety. As you prepare to install the skylight, prioritize the well-being of everyone involved. Ascend a stable ladder or scaffolding to reach the roof securely, and don’t overlook the significance of safety goggles and gloves that shield against debris and potential hazards. If you’re not entirely comfortable with heights or the nuances of handling roofing materials, consider partnering with a seasoned professional. Their expertise will not only ensure a secure installation but also provide peace of mind.
- Accurately Measuring and Marking the Opening on the Roof: Begin by meticulously measuring the intended area for the skylight. Ensure that your measurements align with your initial planning to guarantee optimal light exposure and a harmonious fit within the room. Once the measurements are confirmed, mark the perimeter of the skylight opening on the roof. These markings will serve as your guide as you transition to the next step.

- Safely Cutting Through the Roofing Materials: With the marked outline in place, it’s time to carefully cut through the roofing materials. Depending on the type of roof you have, utilize the appropriate tools – be it a circular saw, reciprocating saw, or another suitable cutting tool. Approach this step with precision and caution, ensuring that the cut is clean and accurate. As you proceed, prioritize safety by wearing protective gear and taking the necessary precautions to prevent damage to the roof structure.
- Applying Waterproof Flashing to Prevent Leaks: Position the waterproof flashing around the perimeter of the skylight opening. This flashing acts as a barrier against moisture, safeguarding the interior from potential leaks. Pay careful attention to the positioning, ensuring that the flashing covers all vulnerable areas susceptible to water seepage.
- Properly Sealing the Edges of the Flashing to Ensure Water-Tightness: Achieving a water-tight seal is paramount in preventing any water-related issues in the future. Apply a high-quality waterproof sealant along the edges of the flashing. This step not only seals potential entry points for water but also reinforces the flashing’s protective capabilities.
- Carefully Placing and Securing the Skylight Frame: Begin this stage by placing the skylight frame onto the designated opening. Gently position it in alignment with the markings and guidelines you established earlier. Ensure that the frame rests level and square on the roof, as any misalignment can affect the overall aesthetics and functionality of the skylight. Take your time to make any necessary adjustments to achieve a perfect fit before moving on to the next step.
- Attaching the Skylight to the Roof Frame While Maintaining a Snug Fit: With the skylight frame in its ideal position, the next step involves attaching it securely to the roof frame. Employ the appropriate fasteners, whether roofing nails or screws, to affix the frame to the roof structure. As you proceed, prioritize a balanced approach – secure the frame firmly enough to ensure stability, but avoid over tightening to prevent potential damage to the skylight or the roof structure.
- Using Appropriate Sealants to Prevent Water Infiltration: To safeguard against potential water infiltration, apply specialized sealants around the edges of the skylight frame. These sealants act as a barrier, preventing moisture from seeping into your living space. Pay meticulous attention to detail during this phase, ensuring that every crevice and joint is adequately sealed. A watertight seal not only prevents leaks but also contributes to the longevity of your skylight installation.
- Insulating Around the Skylight to Enhance Energy Efficiency: Enhance the energy efficiency of your skylight installation by insulating the surrounding areas. Proper insulation helps regulate indoor temperatures, minimizing heat loss during colder months and preventing excess heat gain in warmer seasons. Choose insulation materials that are suitable for your climate and adhere to best practices to ensure optimal results.
- Verifying That the Skylight Is Securely Installed: Take the time to carefully examine the skylight frame for solidity and confirm its robust connection to the underlying roof structure. Conduct a gentle yet thorough evaluation of the frame, meticulously searching for any potential hints of movement or a lack of steadfastness. It is imperative to note that a properly and securely installed skylight will unequivocally retain its stable and stationary disposition. This resilience should persist even when subjected to minor external pressure or forces.
- Checking for Any Gaps or Areas Requiring Additional Sealing: Carefully inspect the skylight frame and surrounding areas for any gaps or openings that might compromise the seal. Address these gaps promptly by applying additional sealant to ensure a comprehensive and effective barrier against water infiltration.
Enhancing Aesthetics and Functionality: Interior and Exterior Considerations
Once the skylight is securely installed on your new roof, it’s time to explore ways to maximize both its aesthetic appeal and practical benefits. By considering interior and exterior aspects, you can truly harness the potential of your skylight.

Choosing Appropriate Window Coverings for the Skylight
Window coverings play a vital role in controlling the amount of light that enters the room through the skylight. Depending on your preferences and needs, you have various options to choose from. Roller shades, blinds, and cellular shades are popular choices that allow you to adjust the amount of light and privacy according to the time of day. Consider materials that complement your interior decor while providing efficient light management.
Utilizing Skylights for Improved Ventilation and Air Circulation
Skylights not only provide natural light but can also contribute to improved indoor air quality and ventilation. Vented skylights are designed to open and allow fresh air to circulate through the room. This is especially beneficial in areas like kitchens and bathrooms where moisture and odors tend to accumulate. By strategically placing vented skylights, you can facilitate the escape of stale air and enhance the overall comfort of your living space.
Maintenance and Longevity of Skylights
The installation of a skylight on your new roof brings a renewed ambiance to your space, but to ensure its continued functionality and allure, proper maintenance is essential. In this section, we delve into the measures necessary to preserve the beauty and longevity of your skylight.
Regular Cleaning and Maintenance Routines
Just like any other component of your home, skylights require periodic maintenance to keep them transparent and efficient. Accumulation of dust, debris, and environmental contaminants on glass can prevent sunlight from passing through unobstructed. It is advisable to set a constant cleaning regime covering both the outer and inner surface of the skylight. By using a mild, non-abrasive cleaner combined with a soft cloth, you can effectively remove dirt and dust while ensuring optimal light penetration.
Addressing Potential Issues Promptly to Prevent Damage
The exercise of vigilance assumes paramount importance in the identification and resolution of potential quandaries associated with your skylight. It is imperative to routinely inspect both the skylight itself and its immediate environs for any indicators of leaks, fissures, or compromised flashing. Timely mitigation of these concerns is imperative to forestall the incursion of water, a menace that could potentially engender more extensive harm to both your roof and the interiors. Should you encounter any complications that surpass your personal proficiency, it is advisable to seek the counsel of a professional, thereby ensuring the application of appropriate solutions.
As we conclude our exploration of installing a skylight on a new roof, it’s evident that this endeavor holds transformative potential for your living spaces. By following the meticulous steps outlined in this guide, you’ve gained insight into the planning, execution, and maintenance required to ensure a successful skylight installation. From evaluating the ideal location and size of your skylight to ensuring proper sealing and insulation, each step contributes to the overall outcome. Accurate measurements, careful cutting, and expert flashing installation guarantee both the structural integrity of your roof and the comfort of your interior spaces. With a skylight gracing your new roof, you’re not only inviting sunlight indoors but also fostering an environment that blends comfort and elegance seamlessly. The benefits are not just measured in increased property value but in the quality of life you experience within the walls of your cherished home.